


How to code an invoice
In order for an invoice to be processed through to payment, it must be broken down into one or more invoice lines, and a Cost Account and Cost Centre specified for each invoice line. This process is referred to as “Coding” the invoice.
To Code an invoice, select the invoice from the list of invoices on the Invoices tab of the Home page and click the View link (or double click the invoice in the list). This will display the “Invoice Details” screen.
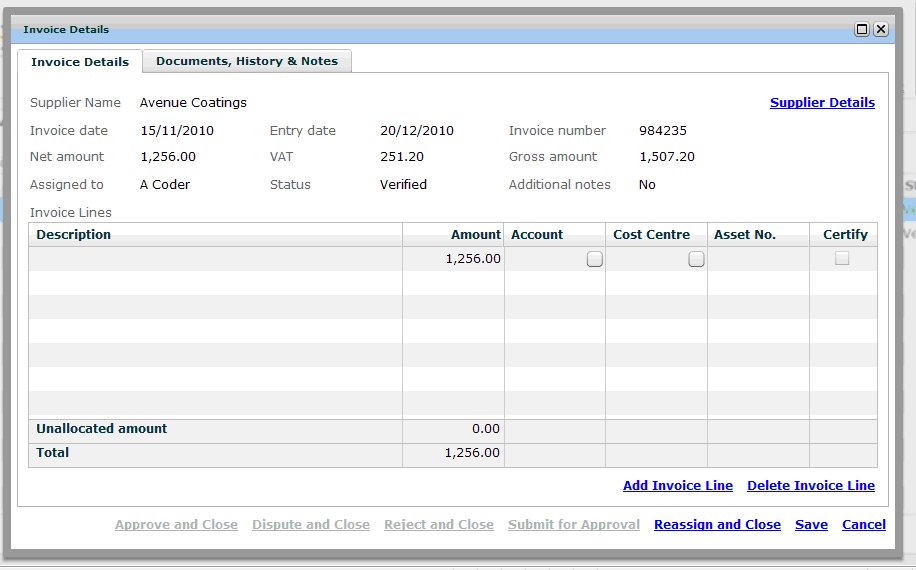
The screen shows various non-editable information about the invoice (invoice date, amounts, etc.) at the top, and a table of invoice lines below.
Adding and removing invoice lines
Additional invoice lines may be added to the table by clicking the "Add Invoice Line" link below the table. Lines may be removed from the table by selecting the line in the table and clicking the “Delete Invoice Line” link.
For an invoice to be valid, it must have at least one invoice line.
Basic Coding
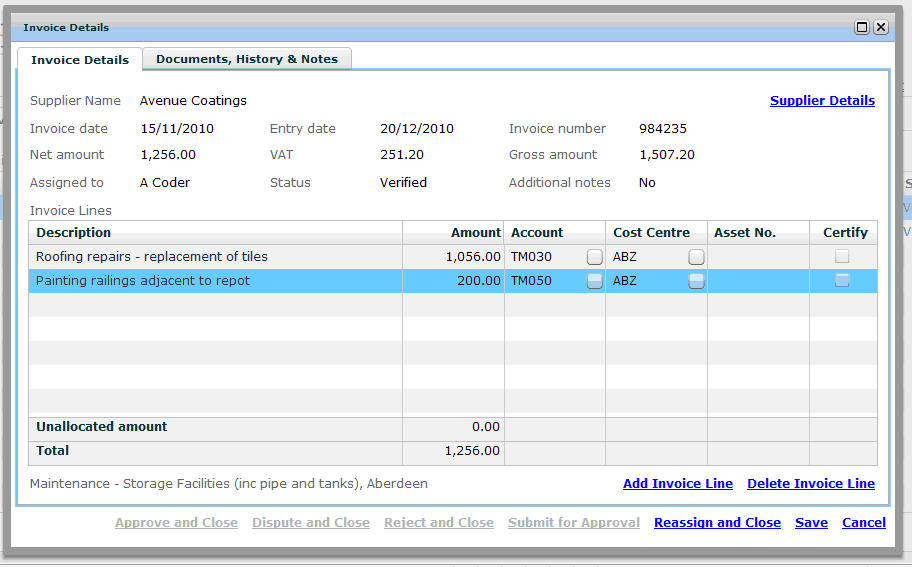
For each invoice line you must enter a description, an amount (excluding VAT), an Account and a Cost Centre, as follows:
- The description should clearly identify the nature of the goods or services being purchased. This information will flow through to cost reports, and so the more information entered here, the easier it will be to understand what has been charged to each Cost Account and Cost Centre.
- The amount for the invoice line should exclude any VAT. The total of the amounts of all invoice lines must add to the net amount of the invoice (any difference will be shown in the "unallocated amount" line at the bottom of the invoice.)
- The Account column determines against which Cost Account the expenditure is to be booked (e.g. "Repairs & Maintenance – other"). You may select the Cost Account by clicking the small button in the Account column and choosing an account from the list.
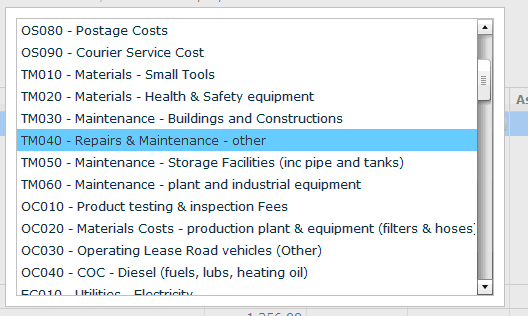
Alternatively, you may type in the account code (e.g. "TM040") directly into the cell of the table. A full list of account codes is available here. - The Cost Centre column determines to which Cost Centre the expenditure is to be booked (e.g. "ABZ"). You may select the Cost Centre by clicking the small mutton in the Cost Centre columns and choosing from the list, or by typing the Cost Centre code directly into the cell of the table. A full list of cost centres is available here.
Once you have selected the Cost Account and Cost Centre, a more detailed description of the selection is displayed below the table.
Asset Numbers
When expenditure is booked against certain Cost Accounts (typically for vehicle costs), you will also be required to specify an Asset Number (normally the vehicle fleet number) for the invoice line. You may select the Asset Number from a list of acceptable values by clicking the small button in the column, or you may enter the Asset Number directly into the table.
If no Asset Number is required for the selected Cost Account, the cell will remain empty.
Saving the invoice
You can save the invoice at any time by clicking the Save link at the bottom right of the screen. An invoice can be saved even if information remains to be entered. The invoice will remain in your list of invoices.
Completing the process
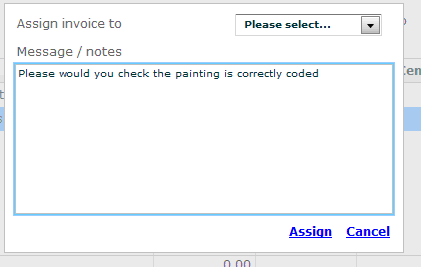
Once you have finished coding each invoice line, the invoice should be assigned to the person responsible for the budget against which the expenditure has been coded.
To assign the invoice to another North Air employee, click the "Reassign and Close" link at the bottom of the screen and select the person from the drop-down list at the top of the screen. You may also want to enter a message in the box below.
Once the invoice has been assigned, it will be removed from your list of invoices.